 Miscellaneous Miscellaneous
Instruments
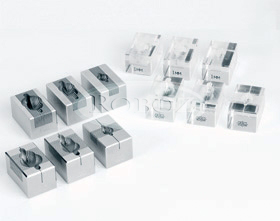
- Alto Matrices - Size Chart
- New Spinal Cord Matrices
- New Tumor Matrices
- 0.5mm Brain & Heart Matrices
- 1mm Brain & Heart Matrices
- Suction Tubes
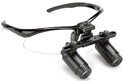
- New Binocular Magnifying Loupes
- Binocular Magnifying Loupes
- Gemini Cautery System
- Cautery Replacement Tips
- Surgical Clippers
- Feeding Needles
- Ear Punches
- Ideal™ Micro-Drill
- Drill Burs
- 3M Durapore™ Surgical Tape
Click here to browse our entire Miscellaneous Instruments selection in our online store.
FAQ's
These are all common questions that we receive from our customers. If you have a question about any of our products, please email us at: info@roboz.com
What is the Gemini Cautery Unit?
The Gemini Cautery System is a unique cauterization unit that has two tip sizes and two different operating temperatures for maximum versatility. The convenient battery spacer converts the hand piece from high temperature to low temperature. Use high temperature for cutting tissue or skin and low temperature for slowing or stopping blood flow. The unit uses standard AA Alkaline batteries and comes with 2 different size tips to use depending upon your needs.
Back
How do I clean and sterilize the Gemini Cautery Unit tips?
The Cautery tool and the Cautery plastic tip adapters can be cleaned and disinfected with alcohol and/or other liquid disinfectant without immersing the tool. To sterilize the wire portion of the tip, turn on the Cautery tool for 5 seconds.
Back
What is the Ideal Micro Drill?
The Ideal Micro-Drill is designed for research applications that require surgical burrs and trephines. It is constructed of light-weight aluminum alloy for balance and control and is powered by a rechargeable 6-volt nickel cadmium battery. Under normal operating conditions the unit will function for 8 hours between charges. No special tools are needed to replace the burrs. The drill comes with a hard plastic case for storage and is covered by a one year warranty.
Back
Does the Ideal Micro Drill come with burs?
The Ideal Micro-Drill comes with a set of 5 round burrs. The set includes sizes 0.6 mm, 0.8 mm, 1 mm, 1.2 mm and 1.6 mm. Additional bur sizes are also available but sold seperately.
Back
How can I sterilize the Ideal Micro Drill?
The Ideal Micro-Drill can be sterilized with EO or low temperature gas plasma sterilizers. Please do not use autoclaves or any method that would allow moisture penetrate inside the drill as it will corrode the electric parts.
Back
Are the Roboz brain matrices available in different sizes and materials?
Yes. Roboz's Alto Matrices are available in coronal (perpendicular to center line) or sagittal (parallel to center line) in 3 different sizes. Alto Matrices are available in acrylic or stainless steel. They are precisely machined to insure reproducible sections through the brain at 1 mm intervals.
Back
What are the differences between the various clippers Roboz offers?
Roboz Surgical Instrument Co. offers 4 different clippers. The RC-5902, RC-5903 and RC-5904 are good for rats and mice. The RC-5905 is good for larger animals.
1. The RC-5902 3M™ Rechargeable Surgical Clippers are compact, lightweight, and feature a pivoting head for removing head and body hair in preparation for surgery or other procedures requiring hair removal. Uses disposable, single-use blades.
2. The RC-5903 Mini-Clipper is a 120 volt clipper that uses only a size 0000 blade.
3. The RC-5904 is a cordless battery operated unit using only a 0000 blade. This clipper can also be operated as a corded unit by connecting the charger. Cord length is 8 ft.
4. The RC-5905 is a 120 volt clipper that offers detachable blades. We offer 2 different types of blades (size 10 for coarse hair, 40 for fine cutting) that you can purchase separately to use with this unit. Blade size will depend upon the animal you are working with.
Back
Should oil or any other liquid be used with the sharpening stone?
Oil and liquid should not be used with a sharpening stone.
The Roboz Surgical Instrument Co. sharpening stone (IN-5) works by rubbing against an instrument’s blade to remove metal, thus making it sharper. Slippery liquids, like water and especially oil, make the rubbing slicker, causing less metal to be removed and sharpening to take longer. Also, there are claims that as your edge is being sharpened on the stone, the oil-suspended metal particles are washing over the edge and dulling it again.
Back
Tech Notes
Tech Notes contain additional information on the features and applications of our instruments.
Cautery
Summary: The main purpose of battery operated cautery units is to cut tissue or coagulate vessels.
The main purpose of battery operated cautery units, such as the Roboz Surgical Instrument Co.'s Gemini Cautery System, is to cut tissue or coagulate vessels. Generally, a low temperature cautery unit is recommended for coagulating blood. It can be used in all different species of animals. The cautery instrument cannot be autoclaved. The tips can be autoclaved but it is not recommended. Always make sure you have fresh batteries in the unit. See operating instructions for proper battery replacement technique.
The high temperature cautery can be used to cut fine tissue or vessels in a variety of animal species. A variety of tips are available for both units. Narrow tips are recommended for areas where you need a fine pinpoint cut or coagulation. The wider the width of the tip coils the wider your cut or coagulation will be. It is recommended that you keep in mind the area and animal size when selecting the proper size tip. There are also bipolar cautery instruments. These instruments are corded and plug into an electrical outlet. Generally, you will find bipolar instruments in a forceps style. The purpose of a bipolar instrument is you can coagulate or cut a vessel as you work at the surgical site. You will not need to put one instrument down and then pick up another.
PROPER USE OF BOTH CAUTERY UNITS
1. Hold stick in the palm of hand with your forefinger on the on/off lever and your thumb resting underneath the stick - similar to holding a pencil or pen.
2. Apply pressure to the on/off lever and the coil tip will heat.
3. Release pressure to the lever to stop the current flow to the coil tip.
Back
Gemini Cautery System Operating Instructions
Summary: Instructions on replacing the tips and batteries in the Gemini Cautery System.
To replace the tip on the Gemini Cautery Unit follow the instructions below:
1. Grasp tip by the plastic body to avoid damage to the cutting wire.
2. Line up the tip to go into the tapered end of the tube.
3. Slide the tip in until the plastic body and hand piece meet.
3. To remove the tip, grasp the ribbed plastic part of the tip and pull tip free.
To replace the batteries follow the instructions below:
1. Unscrew the end cap by turning it counter-clockwise.
2. Insert your new AA batteries into the tube, positive end first.
3. After both batteries are in, screw the end cap back on.
4. To remove the batteries, remove the end cap, place hand over opening, tilt the cautery unit up to allow the batteries to slide free of the hand piece. If batteries do not slide out, a gentle shake may be required. Always use Alkaline batteries.
LOW TEMPERATURE OPERATION
Included with your cautery unit is a battery spacer enabling you to use your cautery unit at a lower temperature setting. To use this lower setting, simply remove the second battery and replace it with the multi-directional battery spacer. Your cautery unit now works at half the temperature. Average temperature with two batteries 2200 degrees F/1204 degrees C. (1300 degrees F/704 degrees C with battery spacer.
WARNINGS: DO NOT USE ON HUMANS. Do not use the cautery unit in the presence of flammable materials. Always use Alkaline batteries. Do not incinerate.
Back
Cautery Tips
Summary: Applications for the Gemini Cautery System Tips.
The loop tip is designed for individuals who need more control of diffuse bleeders. Loop tips are generally used with higher temperatures.
A fine tip geometry is desired for more precise hemostasis. Fine tips can be successfully used with all operating temperatures.
Elongated fine tips are recommended for procedures requiring extended reach and pinpoint hemostasis.
Cleaning instructions for the Gemini Cautery tips can be found here.
Back
Ideal Micro Drill Operating instructions
Summary: Explanation of how to operate the Ideal Micro-Drill.
Charge the drill completely before use. The initial charge of your micro-drill should be between 12 and 16 hours. Use only the supplied Ideal Micro-Drill 120V 60HZ Wall Mount Charger. The use of any other charger may damage the rechargeable battery and will void the warranty. Recharge again when you notice a definite loss of power. Under normal operating conditions the micro-drill will function for 8 hours between charges. The rechargeable battery should last up to 1000 charge/discharge cycles. While charging, the drill may become warm to the touch. This is normal and will not damage the unit in any way.
To activate the micro-drill grasp the unit between your thumb and forefinger allowing the drill to rest on top of your hand. Depress the switch button with your forefinger.
No additional tools are necessary to change burrs. The Ideal Micro-Drill uses carbide steel burrs that have an average shaft diameter of 2.33mm. Simply push the burr in to install and pull to remove. When the burr is inserted correctly, the cutting end of the burr will protrude approximately 22mm from the end of the micro-drill.
The drill speed is approximately 12,000 RPM. When drilling, material should be removed gradually allowing the burr to work freely without binding. Avoid applying excessive force. Dull or damaged burrs should be replaced immediately. Contact Roboz Surgical Customer Service at 800-424-2984 for more information on replacement burrs and accessories.
CAUTION:
1. Do not leave the charger plugged into the drill if the charger is not plugged in to a power source, as this will drain the battery.
2. Do not rest drill on switch/button when not in use.
3. Always store micro-drill in supplied hard case.
4. Use the foam lined hard case to cradle the drill during charging.
5. Do not attempt to autoclave the Ideal Micro-Drill. This will corrode the contacts and short out the motor.
6. Clean only with a moist alcohol wipe.
7. Do not use in the presence of flammable materials.
8. Do not immerse in water.
9. Do not incinerate.
10. This unit is for research use only, not for use on humans.
Back
Alto Brain Matrices
Summary: Alto Brain Matrices allow for either coronal or sagittal sections through the brain at 1mm intervals.
When making a cut it is easiest to insert the blade at an angle, not straight down. Insert the blade in one side of the matrix at about a 45 degree angle then cut with it.
Make the first cut with a blade and leave it in the Brain Matrix. Then take a second blade and make an adjacent cut. Leave this second blade in the Matrix as well. Now you can remove the first blade and cut with it again. Continuing in this "leap frog" method allows for more control over your cuts and limits brain movement while slicing. When using this method, the previously cut slice will stick to the “leaping” blade as you pull it out to make your next cut. This should be removed before making the next cut.
You may also choose to use more than two blades leaving multiple blades in. Some may find it beneficial to place a blade at either end of the desired section, and then make their cuts between the two end blades. Making a cut halfway between the blades, then cutting each half in half, etc. is a very stable way of doing it. Then to remove a slice, pull out the two blades on either side of it. After one slice is removed you only need to pull up one blade at a time to get each additional slice as it should stick to the blade.
Back
Clippers
Summary: Maintenance of Clippers.
Animal clippers will remain serviceable longer if they are properly maintained.
Maintenance of Clipper Unit:
Oiling - There is no need to oil or grease a new clipper. After time a squealing sound may develop. In this case locate the ball bearing (for the A5 model it is located on the right side) and apply 2 drops of clipper oil provided with your unit. It is important not to over oil.
End Cap- Check the end cap of the clipper once a month for hair. Remove any hair inside the end cap using pressurized air or the brush that was supplied with the unit. This will enable free flow of air through the chamber. Reattach the cap with screws.
Greasing- For double speed clippers- unscrew the face once a month if the clippers are used daily. Remove gears and other parts put only a small amount of grease on the gear post. Reassemble the unit. For single speed clippers check every 4 months and follow the same directions.
Brush Replacement- If the blades are running more slowly than normal check the carbon brushes located on either side of the unit. Unplug the unit. With a screwdriver open the cap. For the next step, a brush spring (used to hold the brushes in place) will pop out. Hold your finger over the cap to control the spring. Using forceps or tweezers remove the spring retaining cap. Remove the spring and look at the brush. If it is worn to about 1/16” or less replace each brush with the 2 spare brushes supplied with clipper. Make sure the brush is aligned with the shape of the housing. If not properly aligned the clipper may run slower until the brush adjusts itself while in use.
Maintenance of Clipper Blades:
Wash new blades in Oster Blade Wash to remove the Oster Non-Rust Oil used on the blades during the manufacturing process. Put some wash in a flat dish and run clipper in a bath with only the blade submerged. BE EXTREMELY CAREFUL NOT TO TOUCH ANY CORD OR OTHER PARTS IN THE WASH TO AVOID ELECTRIC SHOCK. Unit will run slowly at first, until the oil is removed by the wash. Remove from the bath and unplug the unit. Completely dry the blade, particularly the side guard. This is important because hair will not stick to a dry blade.
Back
Clipper & Blades
Summary: There are 4 types of clippers.
Roboz Surgical Instrument Co. offers its customers 4 types of clippers. An A5 corded clipper for use with blade numbers 10, 40, & 50. A mini corded clipper for use with blade size 0000 and a cordless/rechargeable clipper for use with blade size 0000. We also offer surgical clippers by 3M which feature a pivoting head and use disposable blades.
The blade size will dictate which animal you will use the clipper on. For example, blades 10, 40, and 50 are recommended for use in larger animals such as large dogs, horses, pigs etc. Blade size 0000 is recommended for use on rats and mice.
Back
Feeding Needles Size Recommendations
Summary: Feeding needles are designed for oral feeding and dosing.
For feeding or dosing using feeding needles, the proper size needle is based on the weight and size of the animal. Needle selection would also depend on the volume and consistency of the dosage. Feeding needles have been found useful in such procedures as flushing fallopian tubes, removal of lachrymal fluids from eyes, and rectal injections. Note that the higher the gauge size the smaller the diameter of the feeding tube.
The recommendations listed below are based on a field survey of users of our animal feeding needles. This data should be used as a guide only, in selecting needles of appropriate gauge, length, shape, and ball size. Needles selection will also depend on the volume and consistency of dosage.
LABORATORY ANIMAL |
RECOMMENDED STANDARD SIZES |
| SPECIES |
WT. RANGE IN GRAMS |
GAUGE |
LENGTH |
BALL DIAMETER |
SHAPE |
| MICE |
To 14g
15-20g
20-25g
25-30g
30-35g
| 24G
22G
20G
18G
18G |
1"
1",1.5"
1",1.5",3"
1",1.5",2"
2",3" |
1.25mm
1.25mm
2.25mm
2.25mm
2.25mm |
straight
straight
straight,curved
straight,curved
straight,curved
|
| RATS |
50-75g
75-120g
100-200g
150-300g
200-350g
|
20G
18G
18G
16G
16G
14G
13G |
1",1.5"
1",1.5"
2",3"
2"
3",4"
3"
3" |
2.25mm
2.25mm
2.25mm
3mm
3mm
4mm
4mm |
straight
straight,curved
curved
straight,curved
curved
curved
straight |
| HAMSTERS |
60-200g |
18G |
2" |
2.25mm |
curved |
| GUINEA PIGS |
250-300g
350-450g
400-600g |
18G
16G
14G
13G
|
1.5",2"
3",4"
3"
3" |
2.25mm
3mm
4mm
4mm
|
curved
curved
curved
straight |
| RABBITS |
1-3kg |
16G |
3",4" |
3mm |
curved |
| PRIMATES |
To 4.5kg |
12G |
3.5" |
6.25mm |
curved |
Back
Animal Identification Methods
Summary: There are a variety of different methods for identification of animals.
There are a variety of different ways to identify animals in the lab environment. The most common methods are ear tagging, ear punching, use of rings, implantable microchips, and tattooing.
Ear Tagging- ear tags are metal numbered tags applied with a special instrument. They are most commonly used in rats, mice, rabbits and guinea pigs. Ear tags are easy to use and are inexpensive but animals can scratch them off and they may cause inflammation to adjacent tissues.
Ear Punching- small holes are punched in some pattern in the ear tissue using a special tool. Ear punches (Roboz item numbers 65-9900 through 65-9902) are used to put a notch or hole in the animal's ear. One type ear punch is a small tweezer-like device held between the thumb and forefinger. This is an inexpensive item but does not last long. A second design is a ring-handled device like a hemostat. This design is more durable, it is easier to manipulate, and your hand is away from the animal when making the punch.
Rings- colored metal or plastic rings are most commonly used on the legs of birds to identify the animal. Individual rings of different colors can identify individual animals or multiple rings (and color mixes) can be used.
Implantable Microchips- Microchips imbedded in a small capsule transmit identification information to a special receiver to identify individual animals. The microchips are glass encased and biocompatible. They are injected subcutaneously with a needle. The system includes a scanner and reader for recording data. Additional features such as body temperature can be incorporated into the microchips.
Tattooing- tattooing is a permanent identification method. Tattooing pencils and tongs are the most common methods of tattooing. Tongs are recommended only for tattooing ears. Rats and mice commonly used for blood sampling and injections are tattooed on the dorsal side of the tail without damage to the blood vessels. Rats also can be tattooed on the ears.
Back
How to Use the Roboz Sharpening Stone
Summary: Use grooves to guide blade sharpening.
The Roboz Surgical Instrument Co.'s sharpening stone, IN-5, is especially unique because of its three grooved sides which allow for easy and stable sharpening. The grooves in the stone are meant to guide the blades in a straight line for optimal sharpening. Simply place the edge of the blade in the desired groove and slide it down to the end, repeating several times until the blade is sharpened. The flat side is best used to sharpen injection needles in the same manner.
Back |